






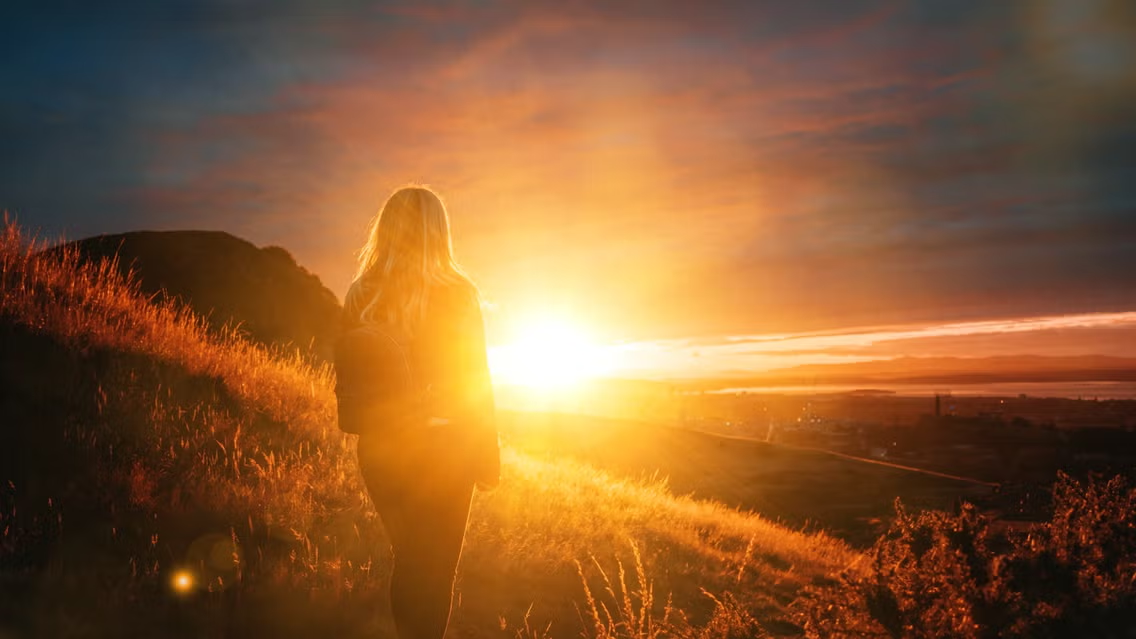
Photography is about more than capturing a subject. Lighting, composition, color, and atmosphere all influence how an image makes people feel. Even a simple photograph can become more engaging when light is used creatively. One technique that photographers often use to achieve this effect is lens flare, which introduces bright highlights and subtle light effects into an image.
Although lens flare can occur naturally when a strong light source enters a camera lens, it can also be added during photo editing. Understanding how to use this effect helps photographers create images that feel warmer, more cinematic, and visually distinctive without making them look artificial.
What Is Lens Flare in Photography?
Lens flare occurs when light enters a camera lens and reflects between its internal elements. This can produce visible streaks, glowing circles, hazy highlights, or a soft reduction in contrast. The effect is particularly common when photographing the sun, streetlights, or other powerful light sources.
In traditional photography, lens flare is sometimes considered an unwanted distraction. However, many photographers deliberately incorporate it into their compositions to create a particular mood. A gentle glow can make a sunset feel more inviting, while a horizontal light streak can give a cinematic quality to a landscape or portrait.
The key is understanding when the effect supports the subject and when it competes with the main elements of the photograph.
Why Photographers Use Lens Flare Effects
Lens flare can serve several creative purposes, depending on the image and the intended result.
Creating a Warm, Natural Atmosphere
Warm light is often associated with peaceful mornings, summer evenings, and memorable outdoor experiences. Adding a subtle flare near the edge of a photograph can reinforce these feelings, particularly in images captured during golden hour.
Portrait photographers may use a soft glow to complement natural skin tones, while travel photographers can use light effects to emphasize the atmosphere of a destination.
Adding Depth and Visual Interest
A photograph can sometimes appear flat when the lighting is uniform. Carefully placed highlights introduce another layer of visual interest and can help guide the viewer’s attention toward the main subject.
For example, a small flare near the sun in a mountain landscape can make the lighting feel more dimensional. In an urban photograph, a controlled glow around distant headlights can create a sense of depth and movement.
Achieving a Cinematic Look
Lens flare is frequently associated with films, music videos, and dramatic promotional photography. Horizontal streaks, diffused highlights, and colorful reflections can give still images a more cinematic appearance.
However, the effect should complement the existing lighting. A bright flare placed on the opposite side of the image from the apparent light source may look unrealistic unless the photograph has a deliberate artistic treatment.
How to Add Lens Flare to a Photo During Editing
Modern editing tools make it possible to experiment with lighting effects without specialized camera equipment. If an image lacks the atmosphere you wanted when taking the photograph, digital editing can help you introduce additional light.
A practical starting point is to choose an image with a clear subject and enough space around the main composition for the effect. Photographs of sunsets, outdoor portraits, architecture, and landscapes are often suitable choices.
You can use an online tool to add lens flare to photo and explore different lighting effects without relying entirely on manual editing techniques. This can be useful when creating social media images, improving travel photographs, or experimenting with a more dramatic visual style.
Once the effect is applied, review the image carefully. The goal is not simply to make the photograph brighter, but to introduce light that supports its existing mood and composition.
Tips for Making Lens Flare Look Realistic
Adding a lighting effect is relatively straightforward, but making it look convincing requires attention to detail.
Consider the Direction of Light
Look at the original photograph before placing the flare. Identify where the sunlight, artificial lighting, or strongest highlights appear to originate. Positioning the effect near a plausible light source usually creates a more cohesive result.
Avoid Excessive Brightness
A flare that covers important details can weaken an otherwise strong image. Start with a subtle effect and increase its intensity gradually. The subject should remain easy to recognize, and important textures should not disappear beneath bright highlights.
Match the Image’s Color Temperature
Lighting has a strong influence on the color of a photograph. Warm golden flares generally suit sunset scenes, candlelight, and evening portraits. Cooler effects may work better with night photography, modern architecture, or images featuring blue and purple tones.
Matching the flare to the existing colors helps the finished image feel more unified.
Preserve Important Details
Pay attention to faces, text, product features, and other elements that need to remain visible. If the flare obscures these details, reduce its size, intensity, or position. This is particularly important for commercial photography, where viewers need to see the subject clearly.
Common Mistakes to Avoid
One of the most common mistakes is using the same lens flare effect on every photograph. Different scenes have different lighting conditions, so an effect that works well on a sunset may look out of place in an indoor portrait.
Another problem is adding too many bright circles or streaks. Multiple overlapping effects can make an image look cluttered rather than atmospheric. In most cases, one carefully positioned flare is enough to create the desired impact.
Photographers should also avoid ignoring the original exposure. If the image is already overexposed, additional bright effects may remove even more detail. Adjusting highlights, shadows, and overall exposure before adding a flare can produce a more balanced result.
Finally, consider the intended use of the photograph. A dramatic effect may suit a creative poster or personal project, while a clean product image may benefit from a more restrained approach.
When Should You Use Lens Flare?
Lens flare is particularly effective in creative portraits, travel photography, landscapes, lifestyle content, and cinematic compositions. It can also help social media creators establish a recognizable visual style across a collection of images.
For professional product photography, the decision depends on the brand and the product itself. A subtle glow might enhance the atmosphere of a fragrance campaign, for example, but excessive light effects could distract from the packaging or label.
The most effective approach is to experiment with different intensities and compare the edited photograph with the original. This makes it easier to determine whether the effect genuinely improves the image.
Final Thoughts
Lens flare is a versatile photographic effect that can introduce warmth, depth, and cinematic character into an image. Whether it occurs naturally during a photo shoot or is added during post-processing, its success depends on how well it works with the existing lighting and composition.
By choosing suitable photographs, matching the direction and color of the light, and avoiding excessive brightness, photographers can create polished images without sacrificing realism. Like any editing technique, lens flare works best when it serves a clear creative purpose rather than becoming the main attraction.

